How to Upload a 3d Picture in Sketchup
Uploading Models
You can upload a 3D model to 3D Warehouse via SketchUp or a spider web browser. All you need is a model and an account.
Ready to start uploading models? The following sections walk you lot through the steps.
Table of Contents
- Preparing a model for upload to 3D Warehouse
- Uploading a model or component from SketchUp
- Uploading a model via a web browser
- Viewing and editing your uploaded models
- Understanding how 3D Warehouse renders file formats and materials
Preparing a model for upload to 3D Warehouse
Before you upload a 3D model to 3D Warehouse, here's what yous demand to do:
- Accommodate the view, styles, and materials to reflect your desired preview image and salve the model before you upload it. The preview prototype that appears on the model details page is based on how the model appears in the drawing area. For case, you might apply the Photographic camera tools to testify the whole model from the front and cheque that the Way settings evidence off your model's all-time await (such as styles that accept shading and materials instead of beingness transparent).
- Bank check your model'southward file size. Models uploaded to 3D Warehouse tin can't exceed 50MB. That size is pretty big for a model, merely if you exercise need to reduce your model's file size, try the post-obit:
- Splitting the model into several files
- Simplifying you model with images by replacing complex geometry with images that convey the same idea or replacing large images/textures (such every bit a large TIFF terrain image) with a file type that offers compression and is optimized for viewing on screen (such as a JPEG or PNG)
Tip: While there are different levels of item required for different purposes, most SketchUp users favor lightweight models that don't wearisome down their computer when working on larger design projects. This blog post describes how to brand a great model for 3D Warehouse.
Uploading a model or component from SketchUp
Y'all can upload an SKP file from whatsoever version of SketchUp to 3D Warehouse. This file can be an open model or a component within an open model.
Tip: Use the component option when you want to upload simply a part of a SketchUp model, such as a single building from a model of a larger development.
To upload a model from SketchUp, follow these steps:
- Employ the Camera tools (Zoom, Orbit, and and Pan) so that the view in the drawing area reflects how you want the model preview image to appear in 3D Warehouse.
- Select File > 3D Warehouse > Share Model from the menu bar. Y'all're prompted to salve your model and purge unused items if relevant. If you're signed into 3D Warehouse, 3D Warehouse opens to the Upload a Model page. If you're not signed in, enter your user name and password and proceed to the Upload a Model page.
- On the Upload a Model page, select your options and fill in the title, description, category and sharing setting as shown in the following effigy. See the following list for details about each choice and field.
Tip: You tin edit an uploaded model's championship, description, and other details anytime. All the editing options are available via your 3D Warehouse Models page.
- Click the Upload button. After you upload the model, 3D Warehouse renderbots generate additional file formats and thumbnail images.

To upload a component within a SketchUp model, follow these steps:
- With the Select tool (
 ), select the component that you want to upload to 3D Warehouse.
 - Context-click the component and select 3D Warehouse > Share Component from the submenu.
- Select your options and fill up in the title, clarification, and category fields. Whether you're uploading a model or a component, your options are the same. See the following listing for details virtually each choice and field.
- Click the Upload button. After a moment, y'all see the model details folio for your uploaded component, which is shared as an SKP file.
On the Upload a Model page, you lot see the post-obit fields and options. Hither'south a guide to the purpose and role of each field and selection:
- Title: If your model appears in 3D Warehouse search results, the championship you enter in this field appears below the model's thumbnail preview image. On the model details page, the title appears beneath the model preview. A skilful championship is specific but cursory. For example, a building'south name and location (if information technology has one, such as "Eiffel Tower, Paris, France" or "Flatiron Building, New York Urban center") makes a good title. Similarly, instead of "Woods chair" or "Bed," add a few details to help differentiate your model, such as "Windsor-mode wooden chair" or "Rustic queen bed with tree branch headboard."
- Description: This field enables you provide a detailed description of your model. For example, yous might describe specific features in your model. If you lot're uploading a historic building, yous might include a brief clarification of the building'south history. To add a hashtag that makes your model easy to find through search, begin by typing # and then some descriptive text. The autocomplete characteristic suggests useful hashtags and helps you avoid typos. To make your model like shooting fish in a barrel to notice you should limit your descriptions to 500 characters or less, and use five or fewer hashtags. Hashtag spam is penalized in search results.
- Category: Click Assign Category to come across a menu of categories and click Apply to assign the selected category to your model.
- Individual model: By default, the toggle is off so that 3D Warehouse users tin can find and download your model. Toggle this selection to the On position if you want to brand the model individual and then that it doesn't appear in search results and isn't attainable to 3D Warehouse users.
- Disable Comments: Comments are disabled by default. To allow 3D Warehouse users to comment on your model via the model details folio, toggle this option to the Off position.
Uploading a model via a spider web browser
When y'all upload a model to 3D Warehouse via a web browser, you tin can upload a SKP file from whatsoever version of SketchUp.
Follow these steps to upload an SKP file via your web browser:
- Point your web browser to
https://3dwarehouse.sketchup.com/and sign in to 3D Warehouse. - Click the Upload a Model icon at the top of the main 3D Warehouse folio.
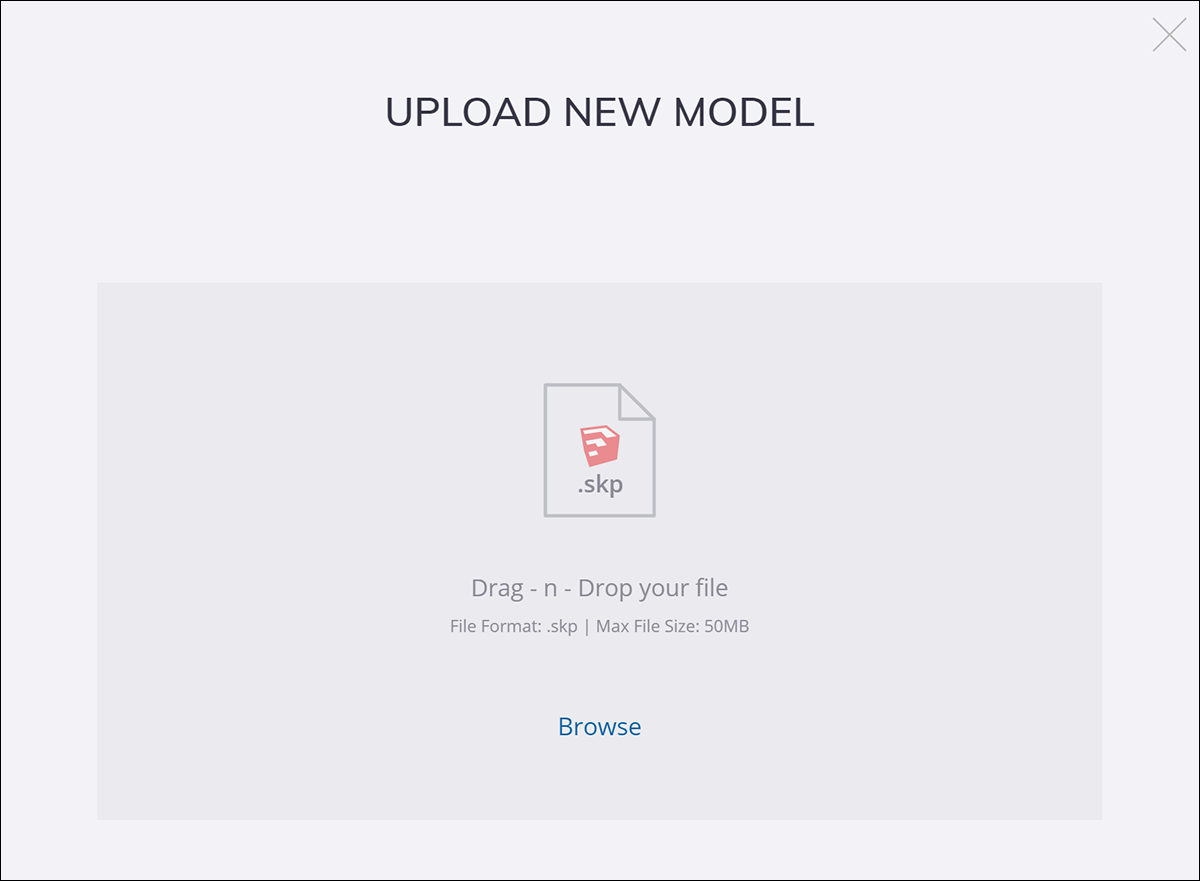
- On the Upload a Model page that appears, as shown in the post-obit figure, elevate and driblet the file you lot desire to upload into the SketchUp File area. Or click the Scan button and select a file saved to your hard drive.
- Fill in the title, description, and category, and select your desired options, which are the same every bit those described in the preceding section, Uploading a model or component from SketchUp.
- Click the Upload button. After a moment, you see the model details page for your uploaded file.
Viewing and editing your uploaded models
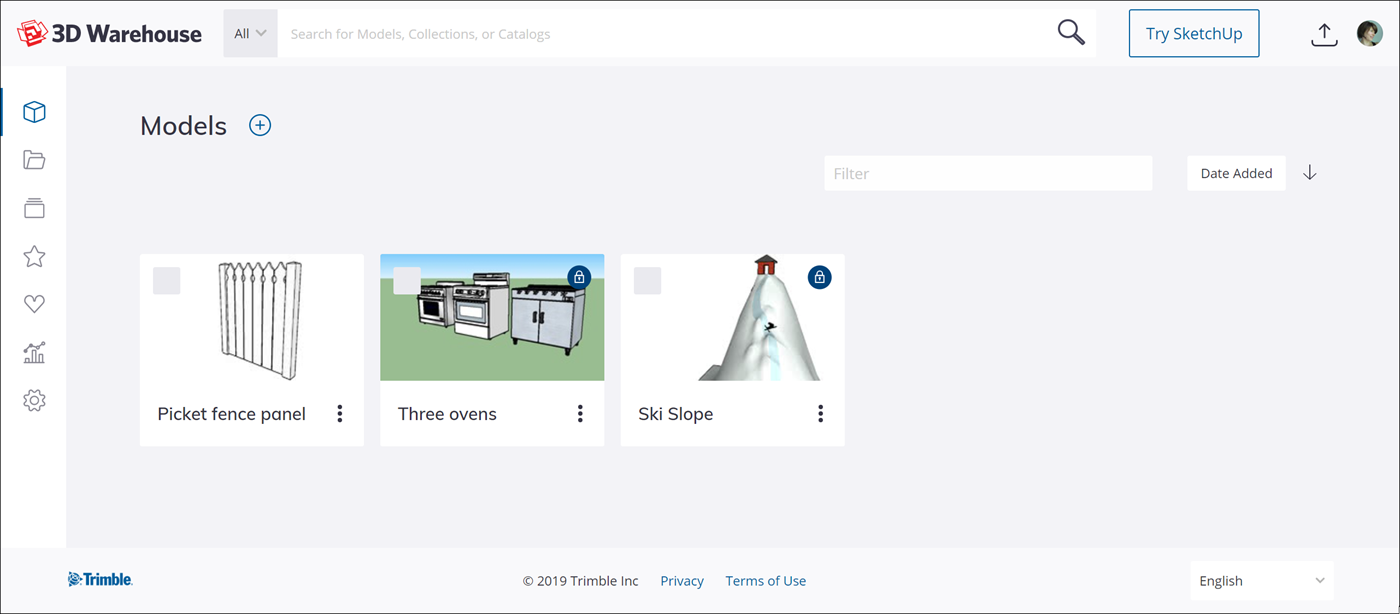
Subsequently you upload models to 3D Warehouse, y'all tin can hands find all your uploaded models on your 3D Warehouse Models page. Simply sign in to 3D Warehouse and select My Content from the user menu. On the Models screen, shown in the post-obit effigy, y'all see all the models y'all've uploaded to 3D Warehouse.
From your 3D Warehouse Models page, y'all can edit a model's privacy settings and any details yous provided about the model. For example, if someone commented nigh an issue with the model that you lot afterward fixed, or if you updated the model to add together a new or improved feature, y'all might add that information to the model's description.
Follow these steps to edit your uploaded models:
- From the Models screen on your 3D Warehouse page, click a model to view its model details page.
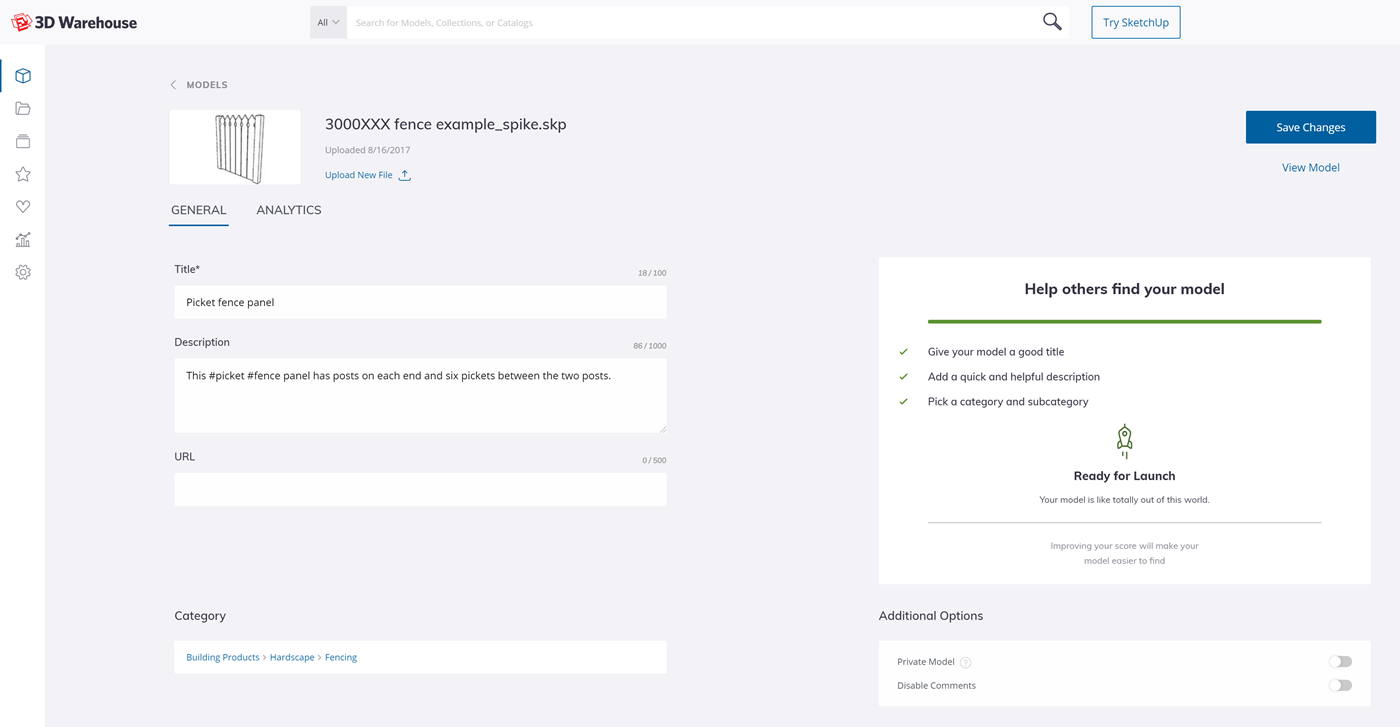
- Click the iii dots below the model preview and select Edit Model from the menu that appears. You can edit any of the options and fields that you filled out when you uploaded the model, as shown in the following figure. Yous can also have the following options:
- Supervene upon the original file with a new one by clicking Browse and post-obit the prompts to upload a new file.
- To delete your model, click Permanently Delete Model.
- Enter a custom URL for your model.
- When you're done editing the fields and options on the model details folio, click the Relieve Changes push button in the upper right. A bulletin appears, confirming that 3D Warehouse saved your changes.
Understanding how 3D Warehouse renders file formats and materials
After you lot upload a model, you may notice that 3D Warehouse renders different file types. Rendering happens automatically as follows:
- If you upload a geolocated SketchUp model, the renderbots create a KMZ file.
- If the SketchUp model you upload is not geolocated, the renderbots create a COLLADA file, which has a
.daefile extension.
Tip: Remember that SKP files are SketchUp models, and KMZ files are models exported to the KMZ format, which works with Google Earth. COLLADA files enable y'all to transfer information among 3D content-creation tools. You can too export models in these file types (and more) from SketchUp.
3D Warehouse supports the current version of SketchUp plus two previous versions. And so if the current version is SketchUp 2019, and so users of 2018 and 2017 volition exist able to download your model.
The renderbots also extract the model'due south materials, which 3D Warehouses users can browse and download individually.
Source: https://help.sketchup.com/en/3d-warehouse/uploading-models
0 Response to "How to Upload a 3d Picture in Sketchup"
Post a Comment